

Hello Kitty:
 Flowers on a tree:


Cute Loop & Dot Trick:
 |
| BTW:the trick is use a big dotter with white polish, then a small dotter with pink polish to make a loop. |

 Pretty Hand Painted Flowers for my mom's B-Day:
Lastly,my flower toenail design:


Crafts, nails, and other things :)
Flowers on a tree: |
| BTW:the trick is use a big dotter with white polish, then a small dotter with pink polish to make a loop. |
Pretty Hand Painted Flowers for my mom's B-Day: These are some random nail designs:
 |
| Green with gold tips and some pink flowers,marble/abstract swirls,leaves,blue with glitter. |
 White with blue stripe and two little roses. Some hoops and dots.
 |
| Diagonally split with green and light pink, a border on top, and a big pink rose in the center. :D Then orange with a pretty purple Hawaiian flower. |


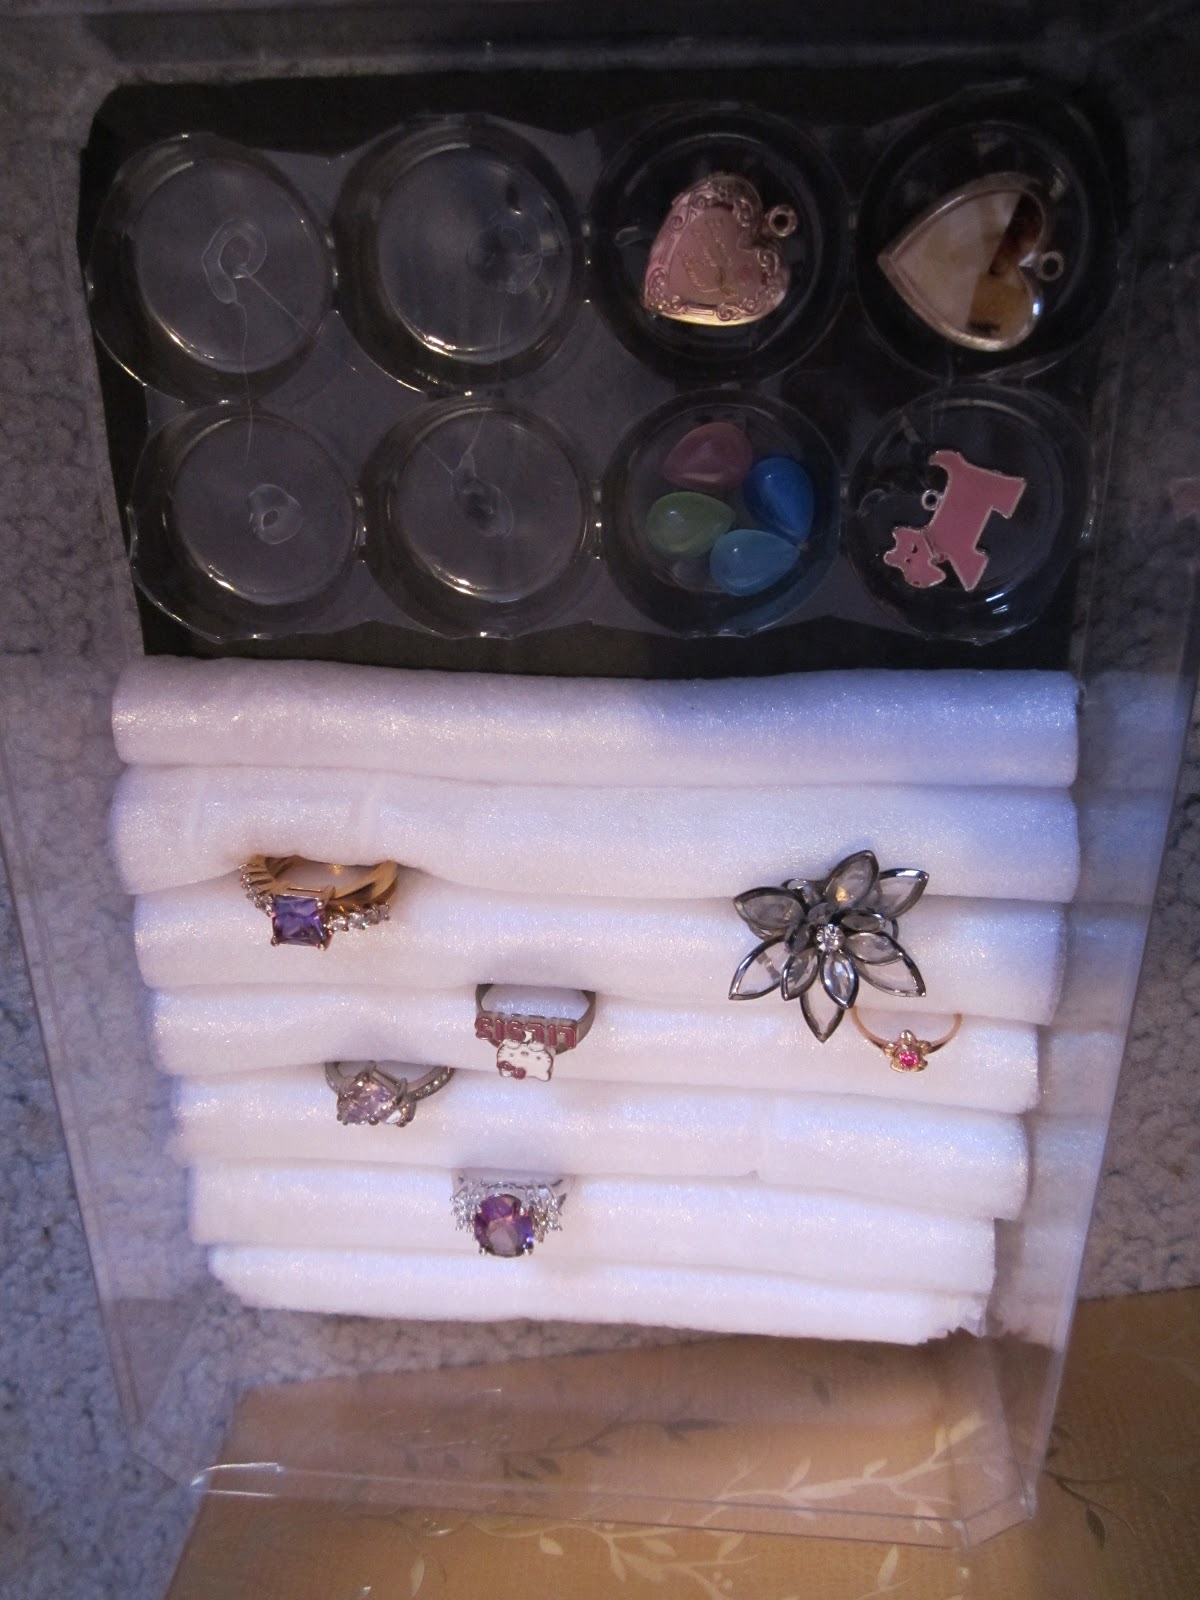 I was obsessed with making these! They are so cute, work, you recycle, and its pretty much free.

 You want to get the measurements of your box or just free hand it, and cut the foam sheets to length. Then, you roll on all the way so its about half an inch in diameter maybe? Use your hot glue and secure the rolls by gluing the edge down, then cut access.
 Then make sure the length of the rolls are the same as the box. Cut if needed, then get your hot glue again and firmly and evenly glue the rolls in rows in your box. Next, when you have glued all rolls, you can decorate the outside of the box or just start putting the rings in right away.


 So I took my cereal box and cut all the way around so I had a five faced box because there was no top. Then with the rest of the cardboard, i made strips while measuring with a ruler, and marking with a pencil. Then you cut slits so they would go perpendicularly and make slots. I made surer it fit then just used my hot glue gun to glue in all the sides.